()
Structural evidence of the Bailey Bridge, River Dart
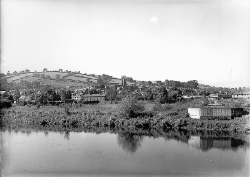
View of Totnes from River Dart, 1953
Bailey Bridge: abutment on west bank
Bailey Bridge: abutment on east bank
Bailey Bridge: ramp to abutment
Bailey Bridge: ramp on east bank
Bailey Bridge: view of west bank from east
Bailey Bridge: spur to ramp
Bailey Bridge location
Robert J. Pocklington, a Bailey Bridge engineer, in 2007
Bailey Bridge: site
Bailey Bridge: surveying
Bailey Bridge: access to the central pier
Preparations for Bailey Bridge, March 1944
Bailey Bridge: central concrete pier
Bailey Bridge: steel-span section
Bailey Bridge: two steel spans and central pier
Ramp for Bailey Bridge, March 1944
Bailey Bridge: first stages, 1944
Bailey Bridge: abutments and central pier
Future location of Bailey Bridge, March 1944
Bailey Bridge, River Dart, 1944
Bailey Bridge pontoon: generic
View of Totnes and Quay Line, 1953